 Installing a new roof or replacing an existing roof is often the biggest expense a homeowner will face, however the roof is also one of the most important parts of a home, with a leaky or improperly installed roof being very expensive and potentially affecting many other areas of the home.
When installing a new roof on your home, the first step should always be planning. It is important to determine what type and how many different supplies you need, as well as doing some comparison shopping to help find the best deal on shingles and other roofing materials.
Table of Contents
- Determining the Square Footage of Your Roof
- Determining How Many Shingles You Need
- A Quick Word About Shingles
- Other Building Supplies Needed
- Getting the Best Deal on Building Materials
Determining the Square Footage of Your Roof
 The total square footage of your roof is one of the most important measurements, as this is used to determine how many shingles you need to buy, as well as a number of other materials.
While you can certainly estimate the square footage, based on the width and length of your house, it is best to physically get on the roof and measure it. Depending on whether you have a ranch style home, front porch, or a more complicated roof layout, this may mean taking several measurements and then adding them together.
For those that do have a roof with multiple pitches or sections, it is a good idea to clearly label them on a note pad.
And, of course, as is always the case, it is important to measure twice and ensure that you come up with the same measurements both times!
For simplicity, we are going to use a ranch style home as an example in how to determine the roof’s square footage.
- First, starting at the top of the roof, measure down towards the ground in a straight line to determine the width of the roof.
- Next, measure along the ridge of the roof, longways, to determine the overall length of the roof
- By Multiplying the width obtained in #1 and the length obtained in #2, you can determine the square footage of one side of your roof.
- Finally, multiply the figure obtained in #3 by 2 to determine the total square footage of your roof.
*If your roof is not an a-frame or you have a porch or other shingled area, you may need to
Determining How Many Shingles You Need
Once you have the total square footage of your roof, you can use this figure to determine how many bundles of shingles you will need, but first you need to figure out how many squares your roof is.
Roofers divide a roof into squares, which are 10 foot by 10 foot sections of roof, using the number of squares as a starting point for their estimate. One square is 100 square feet of roof.
To determine how many squares your roof is, you can divide your total square footage by 100. So, a 3000 square foot roof would be 30 squares. Depending on the ability of the roofing contractor, it is possible to lay upwards of 8 to 10 squares per hour, although a homeowner will not likely be able to match this.
There are generally 3 bundles of shingles in a square, which is 100 square feet, although this can vary depending on the type of shingles you use. For example, three tab shingles are most often going to be 3 bundles to a square, while architectural shingles or slate shingles would likely be different.
To determine how many bundles of shingles you need, you can multiply the number of squares by the number of shingle bundles in a square.
Since 3 bundles per square is the most common, using the above example, you would need approximately 90 bundles of shingles for a 3000 square foot roof. Of course, you would also want to leave a few extra, both in case you mess up any while doing the roof and also so you have some left over later, in case you need to do a repair.
A Quick Word About Shingles
 Shingles come in many different shapes, colors, materials, and sizes. Choosing the right type of shingle will often come down to personal preference and budget.
One important factor to take into account is the warranty provided on the shingles. Usually the shingles will be described as 30 year shingles or 20 year shingles, which means that they will be covered by a basic warranty for that long and should last accordingly. It is important, however, to keep in mind that they shingles must be installed correctly to obtain the warranty, so make sure to follow the manufacturer instructions during installation.
Shingles also come in lots, which means they were manufactured at the same time. Even though the shingle has the same color code, if it has a different lot number, it is likely that it will have a slightly different color. As a result, if you were to install shingles from two different lots, you might end up with a two-tone roof job, which is never desirable.
So, it is important to make sure that all your shingles come from the same lot, to ensure they have the same color.
Other Building Supplies Needed
 While shingles are typically the most important and also most expensive part of a roof repair, there are also a number of other supplies and materials that will be needed.
If you are inexperienced with roofing, you will probably want to speak with a roof builder, to determine what you need, but the following list covers some common items that you will need.
- Felt Paper: Felt is tar covered paper, which is placed directly next to the wood, in between the roof boards and shingles. It provides an added layer of protection between the wood, in the event that water is able to penetrate the shingles. Also, while doing the install, it provides weather proofing and can protect against a sudden downpour during the shingling process.
- Staples: Staples are used to secure the felt in place, until the shingles can be added. A slap-hammer is typically used, as this provides a very quick and efficient way of stapling the felt paper down.
- Roofing Nails: Nails are used to secure the shingles to the roof, as well as in a few other places, such as securing boot-caps for vents and ridge-vent. Depending on how the roof is installed, you will either need traditional roofing nails or nails for a nail-gun, often referred to as racks of nails. Hand nailing is very time consuming, but provides a better solution, while using a nail-gun is much more common and allows the roof to be installed much quicker.
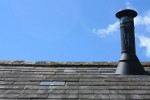
- Vents and Vent Boots: Most roofs have several vents, such as for the bathroom exhaust fans, clothes dryers, and kitchen oven fans. Often this is just a PVC pipe that sticks out of the roof, although this can vary. Vent Boots are rubber seals placed around pipes to prevent moisture from seeping in. You may also have several aluminum vents, which are rectangular and fit over a larger area.
- Roofing Board: You may find, especially on older homes, that there is damage to the roof boards, so they may need to be replaced. You can often tell by looking in the attic, but this is not always the case.
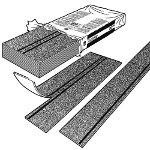
- Roof Fans or Ridge-Vent: Roofs also need to have adequate air flow, to prevent moisture and heat from building up in the attic. Fans were very common in the past and are still used today, but more and more homeowners are switching to ridge-vent, which is installed along the ridge-lines, allowing heat to escape from the roof. It is important to ensure that your home is up to code, so consult local building laws to determine the correct amount of ventilation required for your home.
- Dumpster Rental: You will also need a dumpster for the old shingles, as shingles are very heavy, can not be burned, and can usually not be dumped in a convenience waste center. You could, of course, use a trailer to haul them away, but it is much easier to simply throw them off the roof into the dumpster.
- Ladders: You will of course need a ladder sufficient for reaching your roof. While an a-frame ladder could be used, you will almost always want a straight ladder, which is safer, especially when carrying loads onto the roof.
- Tarps: It is a good idea to place tarps on the ground under the roof. This way during demo, roof scraps are caught on the tarps and, more importantly, so are the roofing nails. This will help save your tires, as roofing nails stand up very easily and can be hard to pickup.
- More: This is only a partial list and does not include tools and likely other items that you will need. As is usually the case, there will likely be other items needed, either because a problem is detected or to address other issues. It is a good idea to make sure you purchase items from somewhere that you can return them later if not used, as well airing on the side of caution and ordering a little extra, rather than not having enough.
Getting the Best Deal on Building Materials
Once you have a list of items that you need, you can begin comparison shopping. Most big-box stores, like Lowes or Home Depot, will provide a written estimate and allow you to build a shopping list, while also providing free delivery.
A good place to start is the building contractors desk, as they can usually get you quickly squared away with a basic list of items needed.
After you have an estimate, you can take it back and forth between the two stores to get the best possible deal. It is also a good idea to check other local building supply companies, using a similar method as above to find the best deal in your area.
